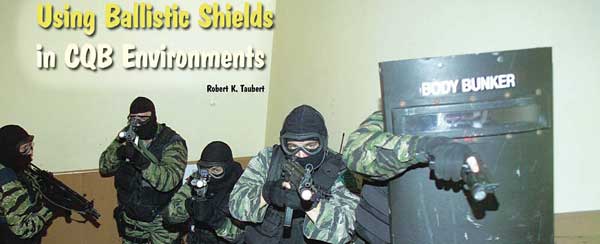
I am an advocate of ballistic shields. They are not only appropriate for law enforcement clearing (slow methodical mode) or safety clears, but, with current weight reductions, can be employed in the slow dynamic technique mode which is a bridge technique between dynamic entries and law enforcement clears.
Slow Dynamic Technique Explained
Today’s Level IIIA shields are lighter and more maneuverable. Shield drivers can move rapidly with them and teams can engage in a bridge technique between the two opposite ends of the maneuver spectrum which I call the “Slow Dynamic” technique.
This method of offensive shield tactics was developed by a former member of the FBI’s HRT and is based on the “heavy/light side” of dynamic room entries.
Movement is conducted in a “careful hurry” manner and usually does not exceed the speed of a fast walk. I like to get the shields into a room first.
Slow Dynamic Technique Formation
In a four man stack, I set up the formation in the following manner: Shield One (handguns); Shield Two (handguns); Cover Man One (shoulder weapon); and Cover Man Two (shoulder weapon).
If a breacher is required, another team member will perform that task, but could be delegated to Cover Man Two. If the breacher must step across the door to access the locking mechanism and face Shield One, proper hallway security must, of course, be established.
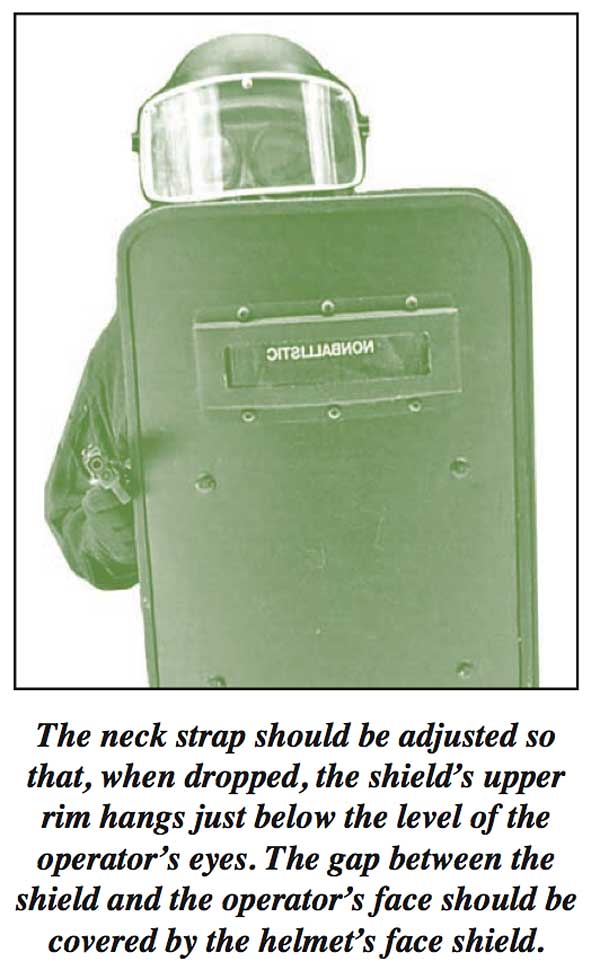
Shield One will stop at the door and wait for the “squeeze” up from the rear to the front on each man’s shoulder to signify the stack is ready for entry. Cover Man One can reach around or step out to squeeze the Shield One’s arm.
The breacher makes eye contact with Shield Driver One and nods when ready to breach. When ready to make entry, Shield One nods in the affirmative in return.
If a diversionary device is needed to precede the physical entry, Cover Man One will deploy it, usually into the “immediate threat area” just inside the door. Dropping the device within a three foot arc beyond the door’s threshold is designed to get the room’s occupants to look away from the flash and the “fatal funnel,” so that at least the first operator can clear the near wall and corner and set up a shooting position before the occupants can recover.
Shield One has complete freedom of movement within the room and will key on the threat and following team members will key on him. Shield One will move aggressively against the threat forcing him to deal with the advancing shield. The threat could be near (shallow) or far away (deep) within the structure. If the use of deadly force is appropriate, the shield driver engages the threat with his laser equipped handgun.
Shield Two enters right on the heels of Shield One and moves opposite from Shield One, focusing on the threat which may, or may not, be on the other side of the room. He must go to the other side and cover that area of the room.
Both shields should not end up on the same side of the room!
In turn, Cover Men will key on their respective shields and, if their shield driver goes deep, they will go shallow into the room and vice versa. If multiple threats are on one side of the room, or the “heavy side,” Cover Men will assist their shield driver with appropriate force.
After immediate threats are secured and searched, unencumbered Cover Men can search the remainder of the room. One man can search while the others cover, or the room can be divided in half and both Cover Men can conduct a staggered search to ascertain if any threats remain.
Pivoting with Shield
Shield operators need to be able to change direction and get the shield between them and a threat as quickly as possible. Keep the shield close to your torso. If you let the shield move away from you as you pivot, it will slow down your turn. Do not extend or mount your gun as you turn. Keep everything tight until you confront the threat or you will be slowed down.
The most important aspect of this technique is not to return fire, but to get your portable cover into position rapidly to absorb any hits.
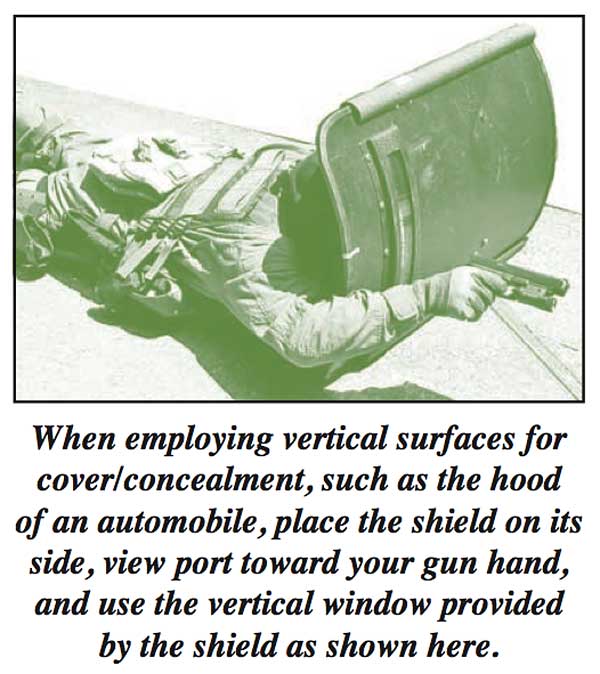
Upside Down and Sideways
When going prone or providing security for a stairway clearing team, consider turning the shield upside down and using the view port from that perspective. In the prone position, it permits you to use the view port, so you don’t have to look around the shield and, on the stairs, it provides overhead cover for the lead element on a stairway.
Defensive Shield Tactics
Adversaries can use shields as weapons against careless, unaware, or unprepared officers. Because of their size and weight and marginal methods of one armed vertical and horizontal control, opponents can exert tremendous leverage to gain control over the shield and/or its operator. Shield drivers must not only learn how to handle the protective device in various tactical situations, but also know how to retain it when challenged; use it as a nonlethal impact tool, if required; and, if necessary, to jettison it quickly.
The most important aspect of shield deployment is to be completely aware of the tactical environment and your proximity to hostile or potentially hostile personnel. Maintain your defensive space with command presence, appropriate commands, and assistance from your cover man. Never get into a wrestling match or go to ground with your assailant! Your opponent can use the leverage he can generate to entangle you in its sling, strike with a weapon, or hammer you with it.
You must be prepared and able to react immediately to counter any attempt to acquire control over your shield. Techniques which can be employed to assist you in doing this include the hand strike, wall pin, and shield uppercut. These methods, as well as others which have proved effective.
Naturally, all of these techniques need to be learned and practiced under controlled conditions before employing them during actual operations.
Hand strike: If your opponent grabs your shield, one option is to target the bony part of your assailant’s hand with the butt of your pistol (finger out of trigger). The hand strike is painful and should cause him to open his hand convulsively, releasing the shield. Immediately follow by ripping the shield back and forth violently if he is also grasping its edge with his other hand, then step back and cover the subject with your sidearm. If this does not work, as in bayonet fighting, immediately counter with another technique, such as a wall pin.
Wallpin: Should your opponent be proximate to a wall and pulling on your shield, give it to him with a hard wall pin. Do not place your helmet or gun hand against, or at the top of, your shield. The impact, if vigorous enough, could “rattle your cage” or result in loss of your handgun or both.
Instead, turn your body 90 degrees so that your dominant side and handgun are away from the shield. Use your support side shoulder against the shield’s back face to make your opponent part of the wallpaper. Violently drive the shield into the subject and pin him solidly to the wall. Order him to “let go” of your shield and have your cover man assist you in disarming or subduing him.
Shield uppercut: If your opponent attempts to pull your shield down by grabbing the top of it, step into him, lower your center of gravity and drive its edge into his jaw or face. Step back, use appropriate commands and cover him with your firearm.
Another technique is to strike his instep or rake the lower edge of the shield over his shins, but that exposes your head to him. Ensure that you maintain control over your handgun and keep it both back and away from the shield.
Cover man takedown: If, during the struggle over your shield, your opponent is between your shield and your cover man and your cover man is not otherwise engaged, he can strip the subject off the shield either by violently striking the back of the subject’s knee with his nondominant foot, applying a choke hold or hair pull, and breaking the subject down to the floor. Again, always try and keep your gun side away from the assailant when engaged in any such activities.
Shield dump: If your shield is being pulled from you and you cannot retain control, tuck your chin into your chest, bend at the waist and let the sling roll over and off your head. You can either let it go completely or retain contact by holding on with the support hand. Always tuck your chin in on the side that the attack is coming from or remember left side/left shoulder, right side/right shoulder and bend over toward the attacker. This technique will work with a ballistic helmet, but you must tape over the two side face shield attachments to reduce snagging.
Driver Stance: Weaver vs. Isoceles
The Weaver Stance will not work with ballistic shields, so square up in an Isosceles type stance. Generally, the shield is held in a defensive position by the support arm with the pistol in the dominant hand. I prefer to keep the hand and pistol behind the shield until the pistol is needed. Maintaining a shield mounted pistol throughout the operation is not only fatiguing, but presents the weapon to an adversary.
When needed, the pistol is presented and mounted to eye level so that the sights can be referenced through the ballistic view port. The arm is bent at the elbow, with its crook resting against the shield’s vertical edge. The pistol may have to be canted inboard so the sights can be identified.
The Baker Batshield
The introduction of the flexible Baker Batshield, designed and produced by former NYPD Emergency Services Unit (ESU) Lieutenant Al Baker, has changed some of the dynamics of shield employment. Now, a shield driver can effectively employ a shoulder weapon, as well as a handgun, by placing and resting the weapon in the shield’s shallow “V” located on its dorsal edge.
The helmet and ballistic face shield equipped operator looks over the shield’s top to acquire threats.
Tactically, this shield may not require a cover man because its unusual configuration permits the operator to employ a superior weapon more effectively. In addition, by looking over the top of the shield while low to the ground, blind spots are reduced.
(Ed. note: We previously took a look at the MRAPS, a Level III ballistic shield from Baker Ballistics that offers some great features for entry teams.)
Laser Sights
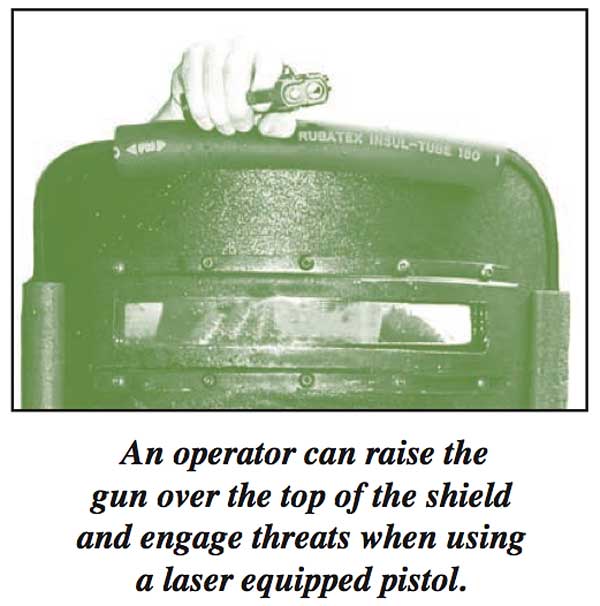
Laser sights reduce arm exposure and the handgun can deliver very effective fire from a below eye level gun mount. Only the hand gripping the gun is exposed and the shooter does not have to see the gun to index it.
In fact, the operator can raise the gun over the top of the shield (periscope style) and engage threats to his front when using a laser equipped pistol. An operator who is moving along a wall on his right side and is reluctant to shift the gun and shield to opposite hands, would be required to step away from the wall to engage targets to his front, possibly exposing the stack to ricochets off the wall. By raising the gun over the top of the shield and tracking the laser to the target, the operator can maintain his “bullet sponge” position.
Some lasers have a constant on switch. If using these types of devices, you will need to keep the gun behind the shield until it’s needed to avoid potential compromise.
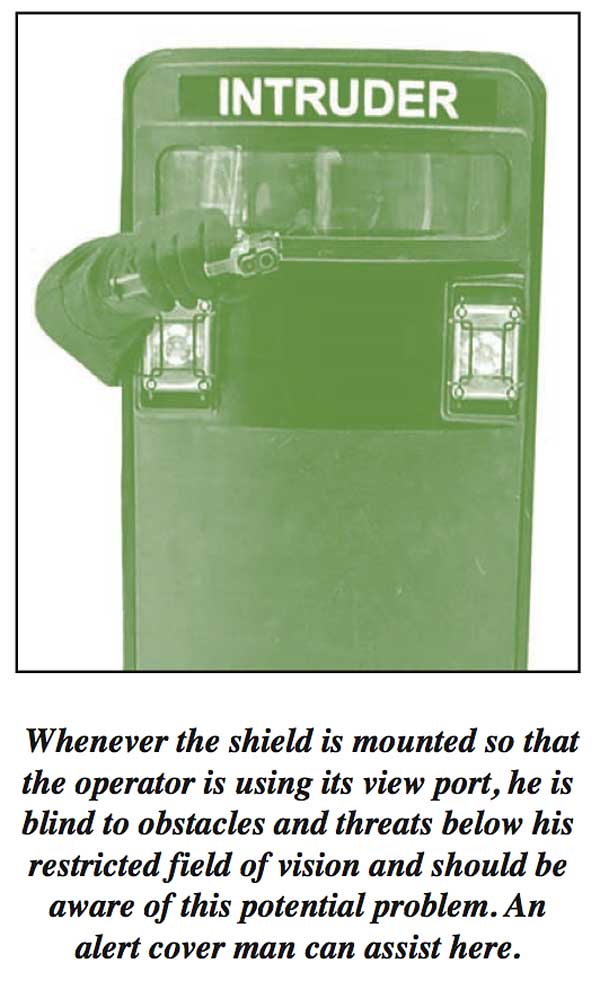
Integrated Illumination System
I also strongly recommend that a ballistic shield be equipped with an integrated white light illumination system. These systems are controlled by the shield driver and can be configured to operate in a number of different modes.
Editor’s Note: This topic is taken from Robert Taubert’s book, RATTENKRIEG! The Art and Science of Close Quarters Battle Pistol. For more information on his book, visit www.saber-press.com.
About the Author: Robert K. “Bob” Taubert has been professionally involved in small arms and tactical training for over 50 years. During his time at the FBI Academy, Bob served a s program manager for the Bureau’s newly created SWAT teams and, later, participated in the creation and training of the FBI’s renowned Hostage Rescue Team (HRT). Bob has trained numerous foreign police SWAT teams for the US Department of State, as well as taught firearms and tactical courses to hundreds of US and allied law enforcement and military personnel.